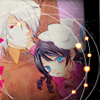
tutorial two: alzeid and rahzel
Achieving this effect:

in
Adobe Photoshop Elements 6.0. Translateable. Should be fairly easy.
step one:Crop and edit your base, prepping it for iconning. I duplicated the base twice and set both layers to Soft Light. If it's too contrasted, lower the opacity.
step two:Now that you've made your base iconnable, you can play with it a little. I made a new adjustment layer by means of a hue/saturation layer. I upped the saturation by +20, but you might wanna go higher or lower. I made it a little lighter too -- +5.
step three:Add
this texture. I don't remember who made it. Obviously, I flipped to my liking, but you don't have to. Set to Multiply 100%.
step four:One more
texture. Set it to Screen 100%.
And you're done!
(Read comments)
Post a comment in response:
scribbld is part of the horse.13 network
Design by Jimmy B.
Logo created by  hitsuzen.
Scribbld System Status
