• Tutorial 003 ▪▪ Photoshop 7+
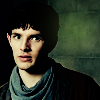
| From This: |
To This: |
 |
 |
|
Starting out with this image, crop and resize to 100x100, and sharpen once. |
|
Duplicate the base, and set to 'Screen' at 35% opacity.
|
|
Create a new layer, flood fill with #9CD9FF. Set to 'Color Burn' at 100% opacity. |
|
Create a new layer, flood fill with #CAAD98, and set to 'Soft Light' at 100% opacity. |
|
Create a new layer, flood fill with #000226, and set to 'Exclusion' at 75% opacity. |
|
Merge all layers, and duplicate the base.
Desaturate (Shift+Ctrl+U).
Set to 'Soft Light' at 100% opacity.
Merge all layers. |
|
Create a 'Selctive Color' layer (Layer > New Adjustment Layer > Selective Color) with the following settings:
Neutrals
Cyan: -10
Magenta: +5
Yellow: +15
Black +5
Blacks
Cyan: +100
Magenta: +15
Yellow: +25
|
|
Create a new layer, flood fill with #BDF662, and set to 'Multiply' at 15% opacity. |
|
Merge all layers.
Duplicate the base.
'Gaussian Blur' it (Filter > Blur > Gaussian Blur) with a radius of 1.0 pixels
Set to 'Overlay' at 25% opacity. |
|
Select the Soft Round Brush, with a diameter of 65 pixels.
Place one dot of #BDF662 on the image.
Merge, and save.
Image Complete. |
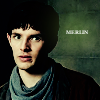
Other Icons Made Using This Method
| With Text: |
 |
| From This: |
To This: |
 |
 |
(Read comments)
Post a comment in response:
scribbld is part of the horse.13 network
Design by Jimmy B.
Logo created by  hitsuzen.
Scribbld System Status